20
How to Stitch Images Together
I woke up today and decided “I want to make a panorama from Curiosity’s photos”. I wish I knew why. Anyways, it led me down some paths I wasn’t expecting to take—let me share what I ended up doing.
(All images in this article are downscaled out of respect for your bandwidth usage. This page is enormous compared to any other on the site because of how image-heavy the topic is. If you want to see any image at full resolution, click on it.)
Acquire Images
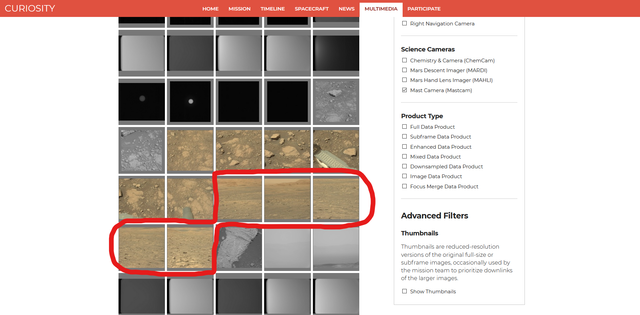
Curiosity’s images are located at mars.nasa.gov. There’s some filters on the side which allow me to narrow down to only Mastcam images (the color camera). Looking back a bit, I find a set of 5 images of the horizon taken on Sol 3000 (2021-01-13).
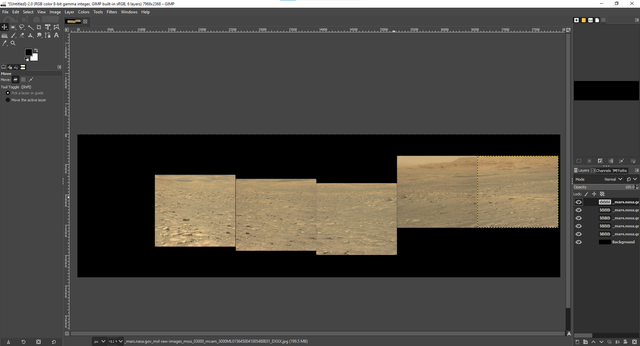
These look like good candidates for a stitching effort, so I download the five images and pull them into my favorite (or at least servicable) image editor on a big canvas to allow me room to work.
Stitch Images
Then I select the second-to-right image with the Unified Transform tool, set its opacity to ~50%, and get to work spending 10 minutes aligning these images by hand only to get it halfway right.
If you watch closely at the overlap between the images, there’s a complex distortion going on that skews the result. Some areas need one kind of transform, while others need another. You can guess and fiddle and manipulate all you want, and probably get close to accurate eventually.
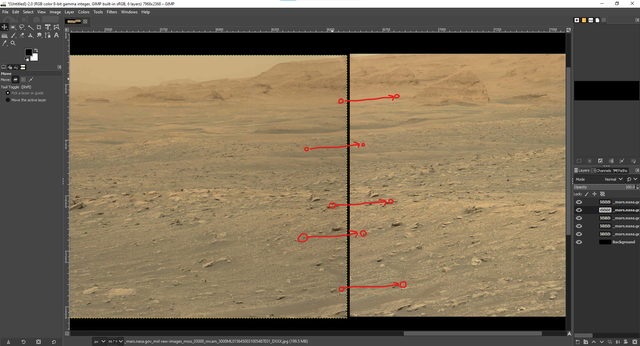
If only there was a way to point to specific things, point out where they need to go, and then transform the whole image based on those landmarks…
How to Point to Specific Things, Point Out Where They Need to Go, and Then Transform the Whole Image Based on Those Landmarks
See that Transform Matrix up in the right-hand corner? That refers to an Affine Transformation Matrix. The general idea is that any transformation of a 2D plane can be represented as multiplying by that matrix. That is, given any original point and the transformation matrix we can find the transformed point with a simple I am not 100% on why the third row exists, but I think it’s literally just so the matrix is square.
We are going to provide the original points and the transformed points , so we will apply to both sides to get Thus our final process is:
- Find some landmark points in the image to stitch.
- Find what they transform to in the image being stitched to.
- Plug them into the equation above to find .
- Apply to the image to stitch.
Minor Issues
This is a great method, and as you’ll see it does a great job. I just want to share a few downsides to this technique as compared to the manual one.
First of all, it’s a simplication of the real world—the camera didn’t truck over from one image to the next: it panned between them. There is distortion involved from rotating the viewpoint around the y-axis that we cannot account for unless we knew all the distances involved. However, it should be quite useful for images that don’t cover too big of a field of arc at once. “All models are wrong, but some are useful.“—George Box
Second, there’s not an out-of-the-box way to apply a transform matrix in either Photoshop or GIMP.
You have to figure that out yourself.
However, because I’m the one who is writing this blog post,
you know I’ve already done it.
I’ll share with you my quick GIMP script for applying an arbitrary transform matrix.
Save this as transform-matrix.scm in your GIMP scripts directory,
and it’ll show up under Transform when you right click on any layer.
; In case you want to make something similar,
; I license this code under CC0 <http://creativecommons.org/publicdomain/zero/1.0/>.
(define (FU-transform-matrix
        img
        drawable
        c00
        c01
        c02
        c10
        c11
        c12
        c20
        c21
        c22)
        (gimp-image-undo-group-start img)
        (gimp-item-transform-matrix drawable c00 c01 c02 c10 c11 c12 c20 c21 c22)
        (gimp-image-undo-group-end img)
        (gimp-displays-flush))
(script-fu-register "FU-transform-matrix"
                    "<Layers>/Transform/Transform Matrix"
                    "Transform a layer by transform matrix"
                    "ethhics"
                    "ethhics"
                    "2021"
                    "*"
                    SF-IMAGE    "Image"         0
                    SF-DRAWABLE "Current Layer" 0
                    SF-VALUE    "A11"           "1"
                    SF-VALUE    "A12"           "0"
                    SF-VALUE    "A13"           "0"
                    SF-VALUE    "A21"           "0"
                    SF-VALUE    "A22"           "1"
                    SF-VALUE    "A23"           "0"
                    SF-VALUE    "A31"           "0"
                    SF-VALUE    "A32"           "0"
                    SF-VALUE    "A33"           "1")
Lastly, the calculation of the matrix isn’t something you can do in a plugin like this with any ease.
That is to say,
you’re forced to record the data points manually,
apply the matrix arithmetic,
and then plug the result back in.
I used Octave to run y*pinv(x) (which will work in Matlab too),
but you may want to use something else to calculate the inverse of your original points
and then left-multiply by your final points.
Remember that each point is a 3-vector of the form
You can see that after matching five points, the new result is much closer than that I got after spending 10 minutes doing it by hand.
Result
Afer repeating this process for the other 3 images, here’s the result (click for full resolution).
Pretty decent!


